
Today I’m going to show you, step by step, how to create and format great looking eBay listings using a pre-made template and Turbo Lister.
If you’re doing more than a few listings a week on eBay, you’ll know how time consuming listing creation, management and scheduling can be, especially if you do it manually and one by one, on eBay directly.
Luckily there are automated listing tools available today, such as Auctiva – which is a web based listing service and Turbo Lister – which is a desktop software. While I won’t go into details on why one is better than the other in this video, just so you know – there’s no one perfect listing tool… each solution has its advantages and disadvantages.
Turbo Lister is the official listing tool created by eBay and in my opinion it’s the easiest way to create, manage and list on eBay, unless you use more sophisticated systems like Linnworks. For most people Turbo Lister will work just fine and that’s why I’ll be using it in this video.
The only real downside to using Turbo Lister is that it can be buggy at times – it can freeze for no reason or show an error or two. From what I have seen, these problems are highly related to what computer/software set-up you have as some people experience a lot of problems while for me, the only problem is occasional screen “freezing”.
While updating or re-installing Turbo Lister will fix most errors, with freezing – just waiting works best. So when Turbo Lister freezes, don’t do anything! Don’t click all over the place – just wait 5-10 seconds and in most cases the software will then work fine.
And don’t worry – it’s not like it freezes constantly, eat least not for me. Maybe I get a freeze once every few days and an error once every month where I need to re-install it. Not ideal, I know, but taking into account that it’s FREE and super easy to use, I haven’t found a better alternative yet. If you know of one, please share it with me in the comments block below this video.
Ok, so I’m using Turbo Lister in this video. That doesn’t mean you can’t use any other listing software and apply the same principles though. You can even follow this video and apply everything when creating a listing directly on eBay! Without further delay, let’s get started!
If you haven’t done it already, download Turbo Lister from eBay.
Please note that there are two versions for the program – the US version which can be downloaded from eBay.com and the UK version which can be downloaded from eBay.co.uk
While you can add additional eBay sites in Turbo Lister after the install, I recommend you start with the version you’ll be working with most. So for example, if your main platform is eBay.co.uk, download Turbo Lister from the UK site. From several tests this has proven to create fewer problems later on when using the program.
Once you have downloaded and installed Turbo Lister, we’re ready to create the first listing.
To speed up this process, what I like to do is gather all my listing information beforehand so I have it handy in a notepad file for easy copying and pasting! As you can see, I have:
All written down and prepared in a notepad file.
Remember, that you only want to use NOTEPAD for such tasks.
Never ever use Word, Excel, or any online website for copying content directly into Turbo Lister! It will mess up the HTML code and you will end up with a buggy listing you can’t even edit or format. So ALWAYS use notepad for managing content and copying and pasting it into Turbo Lister. More about this issue you can read here.
The next step is to actually launch Turbo Lister and create our first listing.
I won’t spend much time covering Turbo Lister’s interface as it’s pretty straightforward and you can find plenty such overview videos on YouTube. Let’s just start working on our first listing by clicking on New > Create New Item.
This is the main listing editing window where you basically add the same information as you would do on eBay directly – starting from the item’s title, sub-title, variations, images and so on!
In pictures, I will be using self-hosted images as they give me more flexibility in terms of how they look + I can change them later on without having to edit the actual listing. If you can’t see the self-hosted image option, you can change it under the settings tab.
So now all I’m doing is copying and pasting image URLs from my notepad. The first image will be the main Gallery image and will be copied to eBay’s server even when using self-hosted images.
Now, a quick note about image sizes – you’ll see a small notice there that says your images should at least be 1600 pixels on the longest side. While this is all good and you should use as large an image as you can, the most important thing to remember is to use a SQUARE image as for your gallery. Why? To get more coverage in search results!
Let’s take a quick look at eBay’s search page:

Now – as you can see, some listings in the search results have bigger gallery images than others – this is only due to the image’s proportion.
If your gallery image is rectangular, your listings will look like this in search results and it doesn’t matter what size they are. On the other hand, if you use a SQUARE image for your gallery image, your listing will look like this.
I don’t have to tell you how much more visible these square gallery images are! Sometimes they’re twice as big as the rectangular images.
This is why you always want to use a square picture for your 1st (gallery) image. Size wise, anything above 1500 by 1500 pixels is enough.
eBay recommends 1600 pixels but that’s really a huge image for web use! Even 1500 pixels is huge! Anyway, just make sure to have the first image square and then with the others you can do rectangular too, as long as they’re big enough.
Now, in the Description Builder – we won’t write anything there just yet, but put some dummy text for now as otherwise Turbo Lister won’t allow us to save the listing.
Next, select listing format, price, quantity, shipping information, payment details etc. We won’t spend time on these as they’re exactly the same info blocks you would be filling out if listing directly on eBay and it’s all pretty much self-explanatory.
Some of these settings can also be set account-wide, directly in your eBay account – like your returns policy and buyer filters.
Once all this information is in place, I like to save the work done so far (just in case Turbo Lister crashes and you lose everything).
In the main Turbo Lister window we can now see the listing I just created. I will double click it to go back to the Editing view and click on description builder to start working on the actual listing description.
First thing you want to do is check the Photo Hosting settings. In the first step we already changed it to self-hosted images so the same should show up here. But still, double check it otherwise you may wonder where your Insert Image icon is as it only shows up if you’ve enabled the self-hosted images option.
The next thing we do is copy your template’s HTML code from notepad, then switch to HTML mode in the program and paste the code there. I’m using a custom made template here but the same principles apply to pre-made templates which are coded in HTML.
After that is done, click on Preview just to make sure that the template files load up nicely. Give it a few seconds to load all images. If no images show up and you’re wondering why, you can also try making a right click and refresh the page as sometimes Turbo Lister doesn’t connect to the internet automatically. All looks good in my case so I’m going back to Design view to continue working on the actual listing description.
Just so you know, this is how all 3 views work in Turbo Lister:

So I’m just copying the item’s description text from notepad and pasting it into the listing description, in Design View!
IMPORTANT! See when I delete the pre-filled text from the template, I leave one word or letter at the beginning just to keep text formatting in place and make sure I don’t accidentally delete any tables of HTML code.
In most cases where people have formatting issues with their templates, it’s simply because they deleted some tables from the template. To prevent this from happening, just do like I do and leave the first letter or word in place when pasting in your text and only then, delete that remaining piece of pre-filled text.
Next, I’ll format the main headline. There’s no one way of doing this right, but these design guidelines will keep you on the right track:
As you can see, it looks quite good… very clear, easy to read and understand!

Right below your headline, you want to put your first and main product image. To do this, simply click your cursor where you want the image to be, center it, copy image URL from notepad and click the Insert Picture icon from the main menu bar to add the image URL.
To make sure it’s the correct image, you can click Preview before inserting the image into the listing description.
All looks good!
As for what image size to use here – it will depend on how wide a template you’re using. Whatever you do, DON’T use the same, super large images you used in the first step when adding images to eBay’s gallery! They’re far too big!
For the actual listing description, you want to re-save the same images at a smaller size. With most templates you’ll want to use images that are 600 or 700 pixels max in width.
You can easily check your template’s width by previewing it in a web browser, then making a screen shot of the actual description area. Then save that file and right-click > Properties – there you can see the image size which will be the actual width of your template’s description area.
Hope that makes sense. If this is too complicated, stick with images less than 600 pixels in width as they should fit 99% of the eBay templates out there.
Next, I’ll format the main description text. Start with splitting up text into paragraphs. Each paragraph should be a max of 3 or 4 lines.
Then, selectively bold some of the most important parts of text. You can also use dark red here to draw attention to/emphasise parts of the description.
By doing this we make the text so much easier to read! Most people nowadays don’t even want to read any large blocks of text and instead quickly scan through it and take the most important parts. So by doing some basic formatting, we really help our customers go through and understand the product description much quicker.
If you have any kind of lists, use bullet points, ALWAYS! You can use Turbo Lister’s built in bullet points OR to make your listing look even more attractive, use small images/icons for bullet points.

As you can see, I have created small circle bullet points for my template. I just use the Insert Picture feature to insert these small icons where bullet points should go. If you do this, remember that these icons should be very small, roughly 15 by 15 pixels with standard sized text.
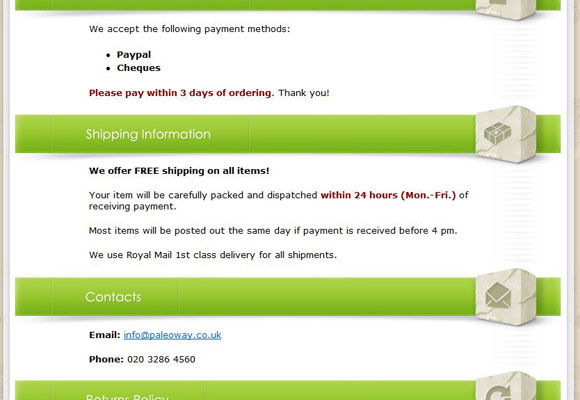
Great! I have now formatted my description text and added images. Next; click on the preview tab to see how it will all look on eBay! Everything looks fine so I’ll go back to Design View to finish it up by adding payment, shipping, contact and returns information.
Keep it simple and to the point! Use single lines and short sentences.
Always use bullet points with lists and do some selective formatting, e.g. bold/change the colour of some text.
If you’re struggling with the formatting, text sizes and colours, just COPY ME! Do exactly as I do in this video – use the same font style, size and colour and you can’t go wrong! This is super simple, fool-proof formatting ANYONE can implement!
When these additional information blocks are added and formatted, switch back to Preview for the last time to double check how the listing will look on eBay. All looks great to me so I’m just saving my listing to quit Edit mode.
You can also preview your finished listings directly from Turbo Lister’s homepage. Simply make a right click over a listing and select Preview.
The thing I like best about Turbo Lister is how easy it is to work with multiple listings!
Once you have created your first listing, you can then DUPLICATE it with the click of a button and then simply change images, the description and prices to quickly and easily create new listings for other products.

This is super handy when you start dealing with loads of similar products.
You can even switch to Edit mode here and do basic editing WITHOUT opening any listings at all. So for example, you want to have the same auction listing but with varying lengths. You simply make 2 copies and quickly change the duration from 3 days to 7 days or whatever you want. Listing created!
Then all you have to do to get the listing live on eBay is select it and click on Add to Upload.
In the Waiting to Upload folder you can quickly calculate your fees and then post your listings on eBay.
Turbo Lister also allows you to schedule your listings so they start at a specific time set by you. This service is free when you have a selling manager pro subscription. If you ask me – you can’t do business on eBay without this scheduling feature as you always want to test out various listing end times to maximise your profit.
That’s it really! In this video I showed you how to create and format a great looking eBay listing in less than 10 minutes! Once you get good at this, you’ll be able to create new listings in 5 minutes or so and even less when you simply need to duplicate an existing listing and make some small changes.
I know that there are people who absolutely hate Turbo Lister for its ‘buggy-ness’ and I can totally understand them. But for me personally and for many eBay sellers out there, Turbo Lister is still the easiest and quickest way to create, format, manage and upload eBay listings!
Thanks,
Andrew